In the realm of home networking and data storage, the concept of a mini home server rack has gained immense popularity among tech enthusiasts seeking to optimize their home server setups. This article, titled “Build Your Own Mini Home Server Rack: A Beginner’s Guide,” delves into the intricacies of crafting a compact and efficient server rack that houses various devices, ranging from media streaming appliances to data storage solutions, all while maintaining a sleek and organized appearance.

Mini Home Server Rack: A Beginner’s Guide to Building Your Own
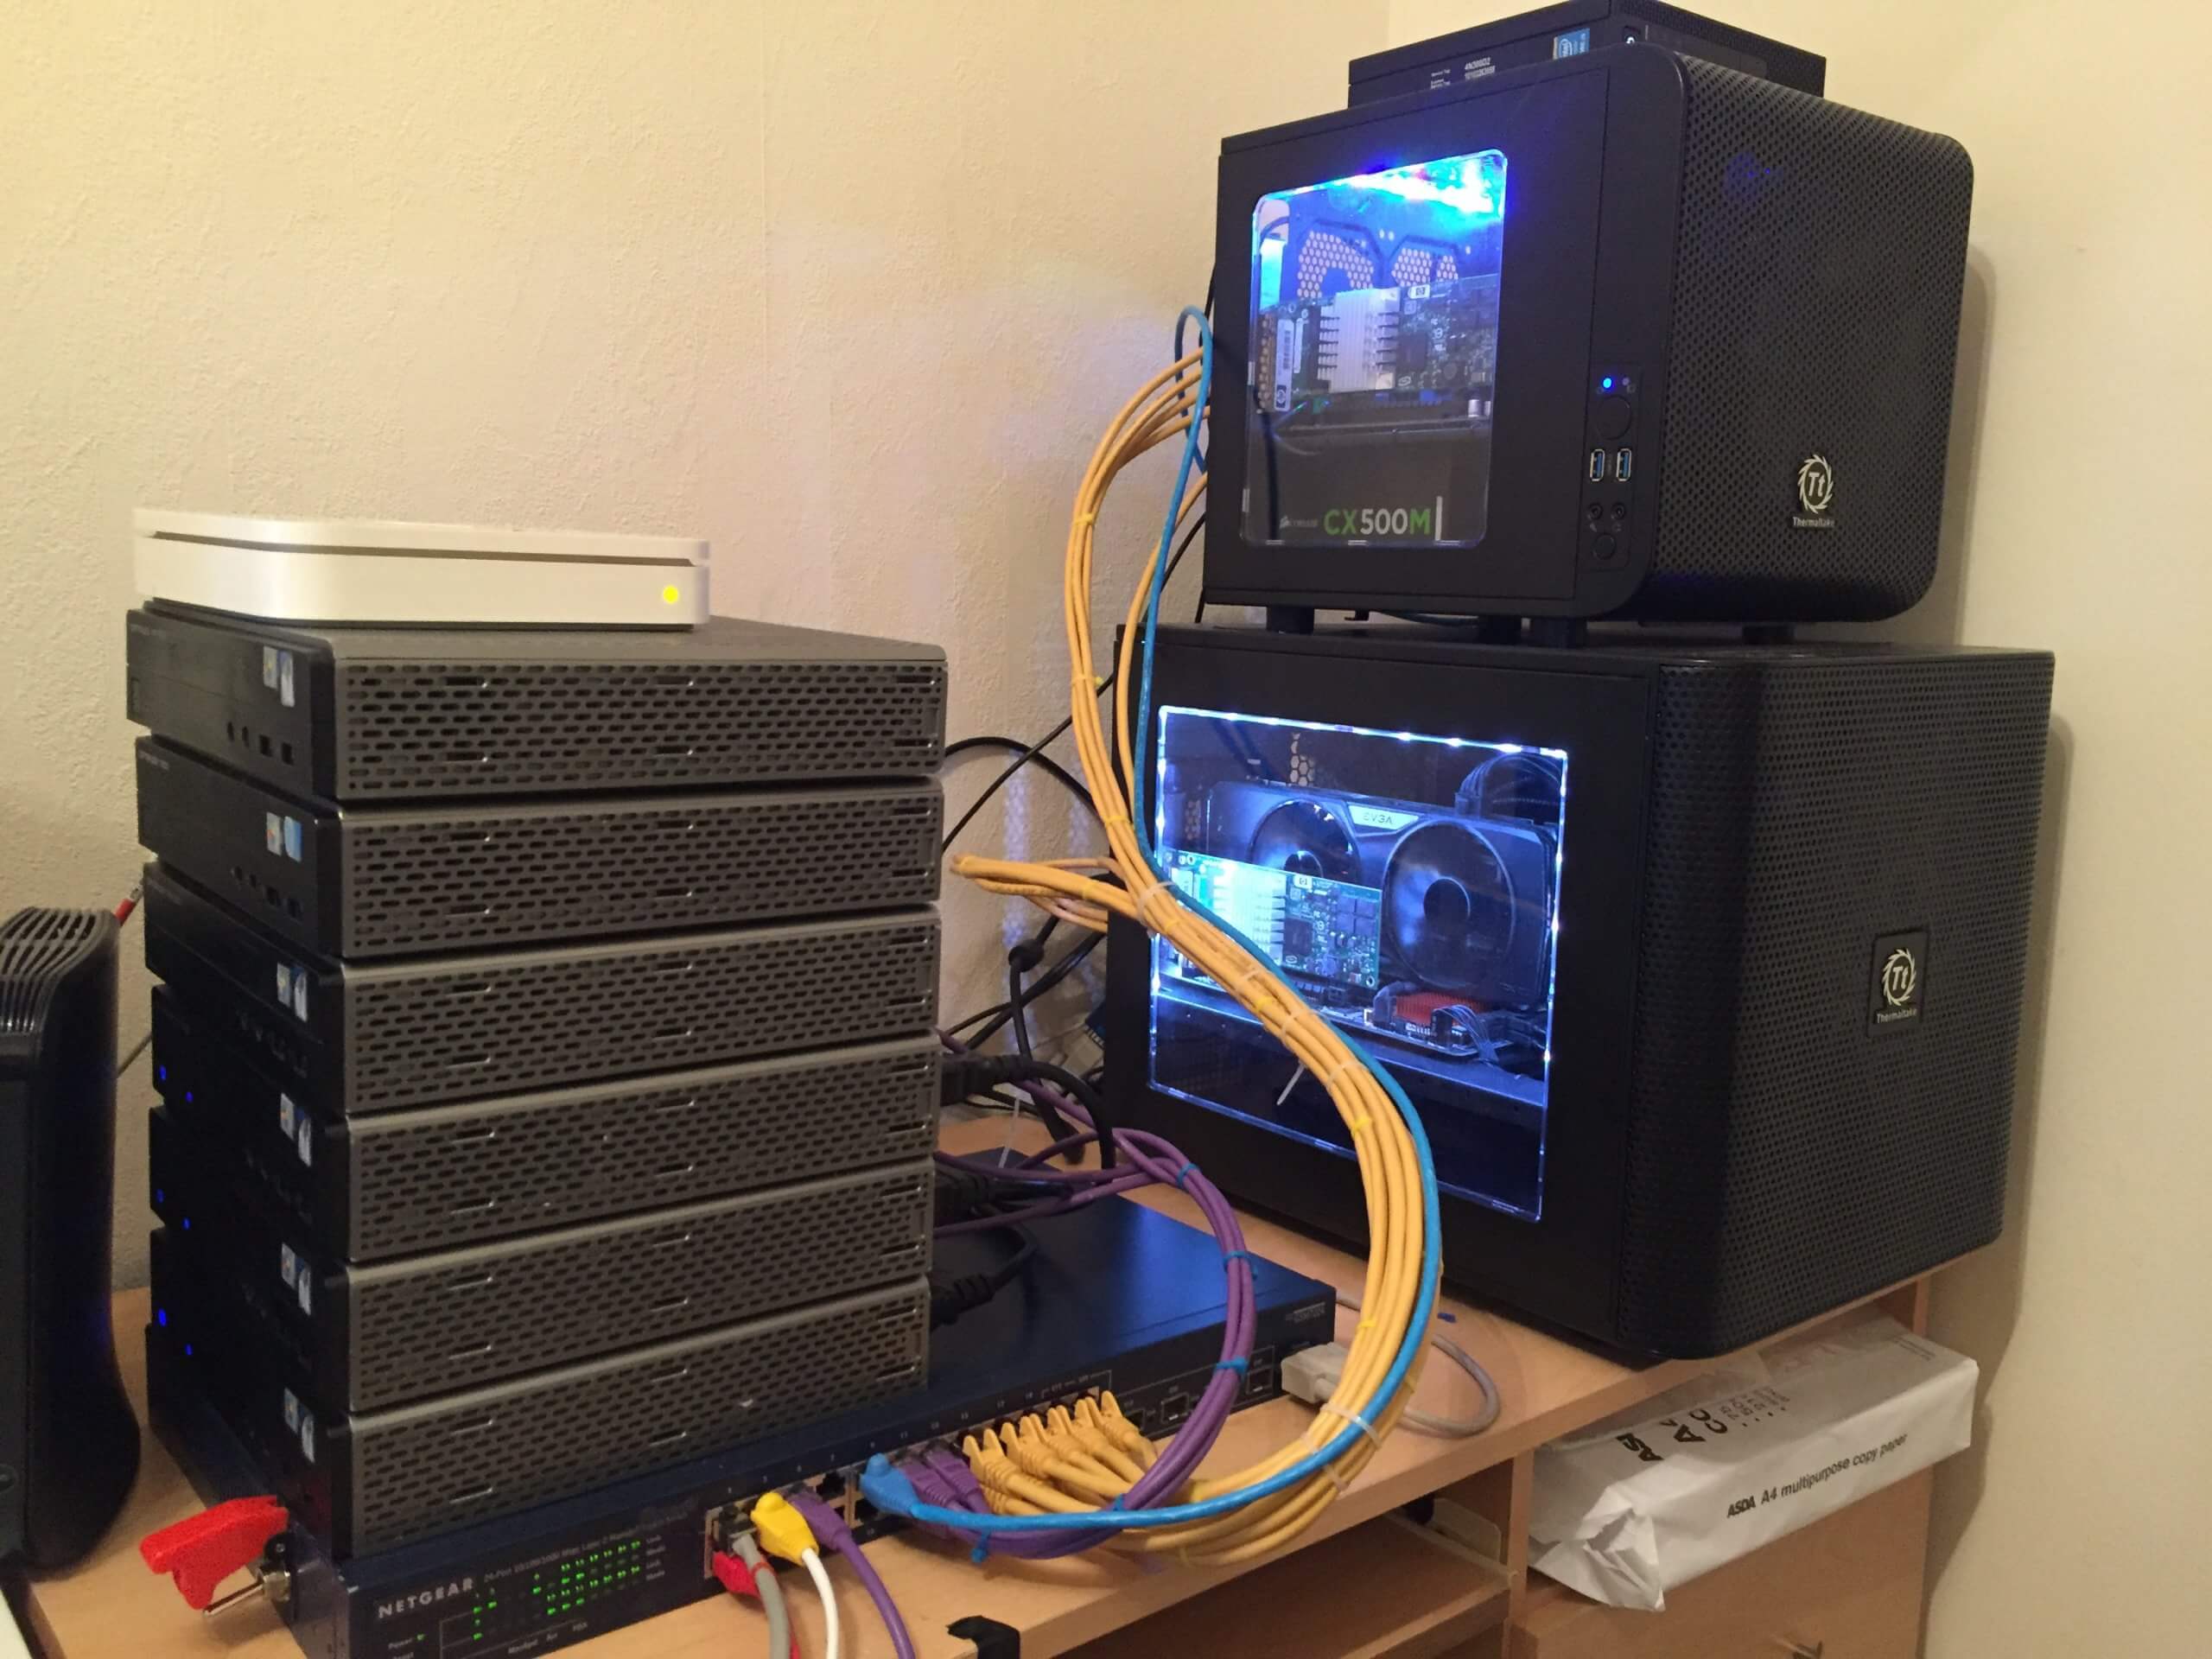
Hello, there! If you’re like me, you’re probably always looking for ways to improve your home network. And if you’re like me, you’ve probably considered building your own mini home server rack.
A mini home server rack can be a great way to:
- Centralize your network devices
- Improve your network performance
- Save space
- Look cool (let’s be honest, it’s a bonus!)
In this article, I’ll walk you through the steps involved in building your own mini home server rack.
Step 1: Choose the Right Rack
The first step is to choose the right rack. You’ll need to consider the size of your devices, the number of devices you want to store, and your budget.
There are a few different types of racks to choose from:
- Open racks: These racks are the most affordable and easiest to assemble. However, they don’t offer as much protection for your devices.
- Closed racks: These racks are more expensive and difficult to assemble, but they offer more protection for your devices.
- Wall-mounted racks: These racks are a good option if you’re short on space. However, they can be more difficult to access.
Step 2: Assemble the Rack
Once you’ve chosen a rack, you’ll need to assemble it. This is usually a pretty straightforward process. Just follow the instructions that came with your rack.
Step 3: Install the Necessary Components
Once your rack is assembled, you’ll need to install the necessary components. This may include:
- A server
- A switch
- A router
- A firewall
- A UPS
- Storage devices
Step 4: Configure the Network
Once you’ve installed all of the necessary components, you’ll need to configure your network. This includes setting up your IP addresses, DNS settings, and firewall rules.
Step 5: Test Your Rack
Once you’ve configured your network, you’ll need to test your rack. This includes making sure that all of your devices are working properly and that you can access them from your other devices.
Enjoy Your New Rack!
Once you’ve tested your rack and everything is working properly, you can sit back and enjoy your new mini home server rack.
Tips for Building a Mini Home Server Rack
- Make sure you have enough ventilation in your rack. Your devices will generate heat, so you need to make sure that there’s enough airflow to keep them cool.
- Use a UPS to protect your devices from power surges and outages.
- Label your cables. This will make it easier to troubleshoot problems.
- Keep your rack clean. Dust and dirt can build up over time and cause problems.
Conclusion
Building your own mini home server rack can be a great way to improve your home network. Just follow the steps in this article and you’ll be up and running in no time.
Indulge in the realm of ultra-conserving power with our innovative mini home server low power and orchestrate a quiet and efficient home network.
Transform your home into a self-sufficient energy haven with our budget-friendly mini home solar system price . Harness the sun’s limitless energy to power your home and embrace energy independence.
Elevate your home entertainment experience with our mini home stereo receiver . This compact powerhouse delivers crystal-clear audio, immersing you in a symphony of sound.
Installation and Assembly Procedure
Welcome, tech enthusiasts! Let’s embark on an exciting journey to build your compact home server rack. From selecting the right components to assembling and configuring it, we’ll delve into the nitty-gritty details.
Key Takeaways:
- Choosing the right rack is crucial for optimal performance and airflow.
- Assemble the rack carefully, ensuring stability and alignment.
- Install components securely, avoiding loose connections and overheating.
- Proper cable management optimizes airflow and maintains a clean setup.
- Configure the network efficiently for seamless connectivity and data transfer.
1. Selecting the Perfect Rack:
Think of your home server rack as the foundation of your home network. Choose one that fits your space and needs, considering factors like size, weight capacity, and expansion potential. Prioritize racks with good airflow and sturdy construction.
2. Assembling Your Rack:
Pay close attention to the instructions provided with your rack. Typically, you’ll start by attaching the side panels to the front and rear frames, followed by installing the mounting rails. Ensure everything is aligned correctly and tightened securely.
3. Installing Components:
Now comes the fun part—installing your server hardware. Begin by mounting the motherboard tray and securing it to the rack. Carefully install the motherboard, ensuring proper alignment with the standoffs. Add the CPU, RAM, and storage devices as per your configuration. Connect the power supply and necessary cables, making sure everything is firmly seated and latched.
4. Taming the Cable Jungle:
Proper cable management not only improves aesthetics but also optimizes airflow. Use cable ties, velcro straps, or cable sleeves to organize and route cables neatly. Keep them bundled and away from hot components to prevent overheating.
5. Configuring the Network:
Finally, let’s connect your rack to the world. Configure the network switch to set up a local area network (LAN). Assign IP addresses and configure DNS settings to ensure smooth communication between devices. If you’re planning on remote access, set up port forwarding and enable secure access via VPN or SSH.
So, there you have it—your mini home server rack, ready to conquer the digital realm. Enjoy the satisfaction of building your own server stack and unlocking new possibilities for media streaming, data storage, and network connectivity.
Implementation and configuration of network connectivity
In today’s digital age, having a reliable and well-connected network is essential for any home server rack setup. Whether you’re a tech enthusiast looking to build a compact media center or a small business owner in need of secure data storage, seamless network connectivity is key. In this guide, we’ll walk you through the steps involved in implementing and configuring network connectivity for your mini home server rack.
Key Takeaways:
- Select a reliable router and network switch capable of handling your network traffic and providing stable connections.
- Utilize Ethernet cables for wired connections to ensure fast and consistent data transfer speeds.
- Consider using a network attached storage (NAS) device for centralized data storage and easy access from multiple devices.
- Implement network segmentation to divide your network into separate segments, enhancing security and performance.
- Utilize quality of service (QoS) features to prioritize certain types of network traffic, ensuring smooth streaming and gaming experiences.
- Configure port forwarding and firewall rules to allow secure remote access to your server rack and protect against unauthorized access.
- Monitor your network performance using network monitoring tools to identify and resolve any issues promptly.
- Regularly update your network firmware and software to ensure security and compatibility with newer devices.
1. Selecting the Right Hardware:
The foundation of your network connectivity lies in choosing the appropriate hardware components. Here’s what you need:
- Router: Select a router that offers the features you need, such as multiple LAN ports, support for gigabit speeds, and wireless connectivity if desired.
- Network Switch: If you have multiple devices to connect, consider using a network switch to expand the number of available ports.
- Ethernet Cables: Ethernet cables are essential for wired connections between your devices and the network. Choose high-quality cables to ensure reliable data transfer.
2. Configuring Your Router:
Once you’ve got your hardware in place, it’s time to set up your router:
- Connect Your Internet Modem: Connect your internet modem to the WAN port on your router using an Ethernet cable.
- Configure Your Router’s Settings: Follow the instructions provided by your router’s manufacturer to configure its settings, including setting up a secure Wi-Fi network and assigning IP addresses.
3. Connecting Your Devices:
Now it’s time to connect your devices to your network:
- Wired Connections: Use Ethernet cables to connect devices like your server, NAS, and gaming console directly to the router or network switch.
- Wireless Connections: Connect devices like smartphones, laptops, and tablets to your Wi-Fi network using their wireless adapters.
4. Setting Up Network Segmentation:
To enhance security and performance, consider dividing your network into multiple segments:
- Create Separate Subnets: Assign different subnets to different segments of your network, isolating them from each other.
- Use VLANs: VLANs (Virtual Local Area Networks) allow you to create logical segments within your physical network, providing additional flexibility and control.
5. Utilizing Quality of Service (QoS):
Prioritize certain types of network traffic to ensure smooth streaming and gaming experiences:
- Configure QoS Settings: Most routers and switches offer QoS features that allow you to prioritize specific applications or devices.
- Assign Priorities: Assign higher priority to applications like streaming services and online gaming to ensure they receive the bandwidth they need.
6. Configuring Port Forwarding and Firewall Rules:
Secure your network by configuring port forwarding and firewall rules:
- Port Forwarding: Forward specific ports to allow remote access to services running on your server rack devices.
- Firewall Rules: Create firewall rules to block unauthorized access to your network and protect against malicious attacks.
7. Monitoring Your Network Performance:
Keep an eye on your network’s performance to identify and resolve issues promptly:
- Use Network Monitoring Tools: There are various network monitoring tools available that can help you track network usage, identify bottlenecks, and troubleshoot problems.
- Regularly Check Your Network: Regularly check your network’s performance to ensure it’s operating smoothly and efficiently.
8. Updating Your Network Firmware and Software:
Keep your network components up to date to ensure security and compatibility:
- Update Your Router’s Firmware: Regularly check for firmware updates for your router and apply them as soon as they become available.
- Update Your Network Switch Firmware: If you’re using a network switch, make sure to update its firmware as well.
- Update Your Network Monitoring Software: If you’re using network monitoring software, keep it up to date to ensure you have the latest features and bug fixes.
With careful planning and implementation, you can establish a reliable and secure network connectivity for your mini home server rack, enabling seamless data transfer, media streaming, and secure remote access.
Troubleshooting and maintenance practices for sustained operational efficiency
In the realm of home server racks, reliability and sustained performance are paramount. To ensure your mini home server rack operates at peak efficiency, regular maintenance and troubleshooting practices must be followed. These practices can be effortlessly integrated into your routine, safeguarding your valuable data and extending the lifespan of your equipment. Some simple yet effective practices include:
1. Embrace Preventive Maintenance:
Conduct periodic inspections of your mini home server rack, paying meticulous attention to components such as fans, cables, and power supplies. Proactive identification and rectification of potential issues can avert catastrophic failures.
2. Conscientious Dust Management:
Dust accumulation can impede airflow and lead to overheating, compromising your server’s performance and reliability. Regularly remove dust from fans, vents, and internal components using a soft brush or vacuum cleaner with a soft attachment.
3. Software Updates and Security Measures:
Implement a regime of regular software updates and patches to keep your operating system, applications, and firmware up-to-date, minimizing vulnerabilities and enhancing security.
4. Uninterrupted Power Supply (UPS) is Crucial:
Protect your server from power fluctuations and outages by employing a UPS. This device will provide temporary power during power outages, ensuring graceful shutdown and protection of your data.
5. Monitor System Health:
Leverage monitoring tools to keep an eagle eye on system vitals such as temperature, fan speed, and disk space utilization. These tools provide early warnings of potential issues, allowing for prompt intervention.
6. Practice Regular Backups:
Implement a robust backup strategy to safeguard your data from hardware failures, human error, or malicious attacks. Regularly back up critical data to an external hard drive or cloud storage service.
7. Ensure Proper Ventilation:
Maintain adequate ventilation around your mini home server rack to prevent overheating. Ensure sufficient clearance for air intake and exhaust, avoiding obstructions that could impede airflow.
8. Observe Power Consumption:
Monitor the power usage of your mini home server rack to identify potential inefficiencies or excessive energy consumption. Investigate ways to reduce power usage, such as utilizing energy-efficient components or implementing power management features.
9. Embrace Continuous Learning:
Stay abreast of emerging technologies, industry best practices, and software updates related to mini home server racks. This will empower you to implement the latest advancements and optimize your system’s performance.
10. Professional Assistance When Needed:
Don’t hesitate to seek professional assistance from qualified IT technicians if you encounter complex issues beyond your expertise. Their specialized knowledge and experience can resolve intricate problems efficiently.
Key Takeaways:
- Regular maintenance: Conduct periodic inspections, dust management, and software updates to maintain optimal performance.
- Safety first: Use a UPS and monitor system health to prevent data loss and ensure reliable operation.
- Backup religiously: Implement a robust backup strategy to safeguard your data from various risks.
- Cooling is key: Ensure proper ventilation to prevent overheating and prolong the lifespan of your components.
- Energy efficiency matters: Monitor power consumption and adopt energy-saving measures to reduce your carbon footprint.
- Embrace continuous learning: Stay updated with industry trends and advancements to optimize your mini home server rack’s performance.

FAQ
Q1: What key considerations should I make when selecting components for my mini home server rack?
A1: When choosing components for your mini home server rack, prioritize reliability, performance, and energy efficiency. Opt for server-grade hardware, select storage devices with ample capacity and fast transfer speeds, and choose network equipment that supports your desired connectivity needs. Consider factors like noise levels and form factors to ensure a compact and quiet setup.
Q2: How can I optimize cooling and airflow within my mini home server rack?
A2: To optimize cooling and airflow in your mini home server rack, consider employing active cooling solutions such as fans or liquid cooling systems. Ensure proper airflow by positioning components strategically and avoiding overcrowding. Regularly clean dust and debris from the rack and its components to maintain optimal performance and prevent overheating.
Q3: What are the advantages of using virtualization in a mini home server rack setup?
A3: Virtualization offers several benefits in a mini home server rack setup. It allows you to run multiple virtual machines on a single physical server, maximizing resource utilization and reducing hardware costs. Virtualization also enhances flexibility and scalability, enabling you to easily add or remove virtual machines as needed and allocate resources dynamically.
Q4: How can I ensure the security of my mini home server rack?
A4: To ensure the security of your mini home server rack, implement robust security measures. Configure firewalls, intrusion detection systems, and antivirus software to protect against cyber threats. Regularly update software and firmware to patch vulnerabilities and enhance security. Additionally, consider implementing physical security measures such as locking the rack and restricting access to authorized personnel.
Q5: What maintenance tasks should I perform to keep my mini home server rack running smoothly?
A5: To maintain the smooth operation of your mini home server rack, perform regular maintenance tasks. Clean the rack and components to prevent dust accumulation and overheating. Monitor system temperatures, fan speeds, and resource utilization to identify potential issues early. Regularly update software and firmware to ensure optimal performance and security. Additionally, create backups of important data to protect against data loss or corruption.
